Thursday, December 26, 2019

dcu.centennial://toasthandler/Create/UpdatesAppliedRequiresReboot Element Not Found Popup

Encountered the following popup after restarted my Dell laptop today.


This is message from Dell Command Update and the version in my laptop is 3.01. Updated Dell Command Update to version 3.10 seems to fix this popup issue. I am using the "Universal Windows Platform version supported only on Windows 10 Redstone 1 v1607, build 14393 or above for 64-bit operating system" link.


Thursday, October 17, 2019

Create stock portfolio on Google Sheets using SGX price data (Updated)

This is the update to my previous post as the revamp of SGX site actually break the previous script where the download link is updated with no date embedded in the link. As there is no date in the link, this script will need to rely on other information which is the running number embedded in the link to automate the download of new data everyday.

Few preparations needed to be done.

Firstly, you need to add in Singapore Calendar in your Google calendar. This can be done as shown below as the script will use this calendar to determine whether the script is run on holiday day:


Secondly, you need to create a new Google Sheets. You need to create 2 sheets with first sheet use to store your portfolio and the second sheet (named as "Data") use to store your downloaded data. In this "Data" sheet, update the last 2 column with the date and counter value. You can get these value by looking at the download link when you download the data from SGX website.


Go to Google Chrome Download menu, and you can find the actual download link, note the number in the link 


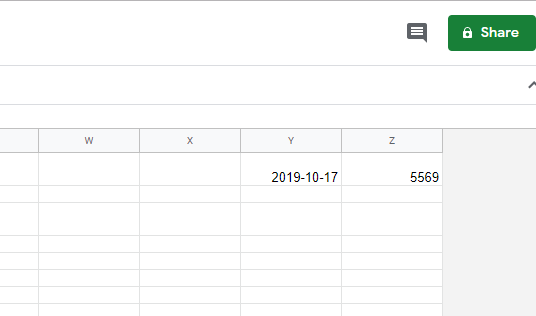
So for this example, the date is 17 Oct 2019 and counter is 5569. Please enter the value to the "data" sheet as shown below.


Once you are done with above, open "Script Editor" under Tools menu and paste the following script or you can download from this link.


Once the data is downloaded to the "Data" sheet, you can now use formula to match stock quotes (column O) and retrieve the share last done price (column G).


Below is the sample table structure for the portfolio sheet.


For the last done price, enter the following formula

=INDEX(Data!$G$1:$G$1091, MATCH (B2, Data!$O$1:$O$1091, 0))

Please note that 1091 is the total row in the "Data" sheet. As there will be new stock list or delist, you might need to adjust this number from time to time.


You can configure trigger to have this script run at certain time everyday. As SGX only release this data after 630pm, i set the trigger time to between 7pm to 8pm.


Wednesday, October 16, 2019

Google App Scripts - Holiday Date Checker

This script help to check whether your supplied date is holiday or not. The script rely on Google Public Holiday Calendar to determine whether the date is holiday or not.

You can open Script Editor under Tools Menu


Once you in Script editor page, you can paste the following code in the editor. Alternatively, you can also go to this link to get the latest code.


Before you can run this script, you need to add in the Google Public Holiday Calendar. For this example, i am using Singapore Public Holiday Calendar but you should be able to use this script for different country calendar.

Go to calendar page, under Other Calendars, select Browse calendars of interest.


Expand Regional holidays and tick  Holidays in Singapore. As you can see, Google has extensive list of holiday calendar for a lot of countries.


Once the calendar is setup, you can try out the script. If you are not familiar with Google App Scripts, running the script for the very first time will usually has permission prompt. Just follow the instruction and allow this script to access.


To test the script, you can just edit the following line to supply the date you want to test. The format is 'yyyy-mm-dd'.

var checkDate = new Date('2021-01-01');


Under Tools Menu, click Run - Run Function - myFunction

Once the script is done, under Tools menu, you can cick View - Logs to check the result.


You can see some sample log output below


Wednesday, October 9, 2019

CentOS 7 dracut-initqueue timeout and could not boot – warning /dev/disk/by-id/uuid does not exist

I encounter this issue after i convert vmdk image to vhd image using Microsoft Virtual Machine Converter with the following PowerShell commands.
Import-Module "C:\Program Files\Microsoft Virtual Machine Converter\mvmcCmdlet.psd1"
ConvertTo-MvmcVirtualHardDisk -SourceLiteralPath E:\imageLocation\source.vmdk -VhdType DynamicHardDisk -VhdFormat Vhd -DestinationLiteralPath E:\vhd\destination.vhd
And this is the screenshot of the issue when i import this VHD. The warning is /dev/disk/by-uuid/uuid does not exist and this partition disk contain the root file system.


To fix this, i boot this VM with CentOS installation disk and select Troubleshooting follow by Rescue a CentOS system


Select 1 to continue


Run chroot /mnt/sysimage to make your system the root environment.


Go to /boot and you can see the list of initramfs images, as i wanted to run this OS using the latest kernel, i will recreate this image - initramfs-3.10.0-862.3.3.el7.x86_64.img


Perform the following commands

cp initramfs-3.10.0-862.3.3.el7.x86_64.img initramfs-3.10.0-862.3.3.el7.x86_64.img.bk

dracut -f initramfs-3.10.0-862.3.3.el7.x86_64.img 3.10.0-862.3.3
After reboot, i am able to see the login screen and can now login to the system.

Sunday, September 8, 2019

Self Signed Cert with IP address as Subject Alternate Name

Most of the guide i found assume you are using domain name. As such i will write down this guide for those who use IP address.

We will create our own root CA cert and later on we will be using this to sign the website certificate. You will be prompted for password to protect your root CA secret key. You need to remember this password as it will be used later.

openssl genrsa -des3 -out rootCA.key 2048

openssl req -x509 -new -nodes -key rootCA.key -sha256 -days 365 -out rootCA.pem

Create a config file (csr.cnf) for generating Certificate Signing Request (CSR)

server.csr.cnf

[req]
default_bits = 2048
prompt = no
default_md = sha256
distinguished_name = dn

[dn]
C=SG
ST=Singapore
L=Singapore
O=test
OU=test
emailAddress=test@192.168.35.123
CN=192.168.35.123

Generate CSR
openssl req -new -sha256 -nodes -out server.csr -newkey rsa:2048 -keyout server.key -config server.csr.cnf

Create a v3.ext for Subject Alternate Name (SAN). So for IP address, you need to use IP instead of DNS

v3.ext

authorityKeyIdentifier=keyid,issuer
basicConstraints=CA:FALSE
keyUsage = digitalSignature, nonRepudiation, keyEncipherment, dataEncipherment
subjectAltName = @alt_names

[alt_names]
IP.1 = 192.168.35.123

Sign this certificate with your root CA

openssl x509 -req -in server.csr -CA rootCA.pem -CAkey rootCA.key -CAcreateserial -out server.crt -days 365 -sha256 -extfile v3.ext
You can now put both server.crt and server.key in your web server.

In order for your browser to accept this self signed certificate, you need to import your rootCA.pem into your system trusted root certificate authorities repository. for Windows system, please refer to this link .